Published: Nov 10, 2021 by Tariq Hawis
HTTP Security Headers have increasingly been adopted by websites owners of all kinds. Especially after the tough last few years of websites breaches that hit small and large businesses.
But what is HTTP Security Headers
To understand security headers, you need to know what HTTP headers are. HTTP headers are metadata that are added to the HTTP request and response to provide more information to the HTTP Server (The Web Server) and the HTTP client (ie. The browser). These headers are very useful for HTTP communication between clients and servers. In addition to the important information they provide for the analysis systems, they also facilitate the ability to define the acceptable requests that the web server can respond to based on information like media type, browser, location, and security policies.
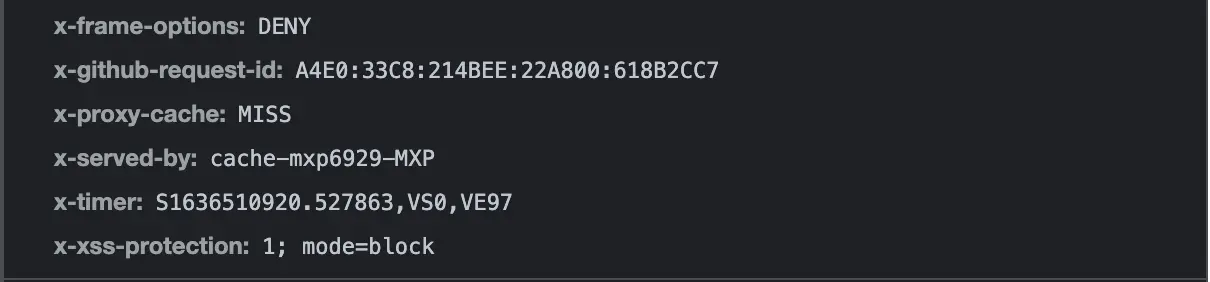
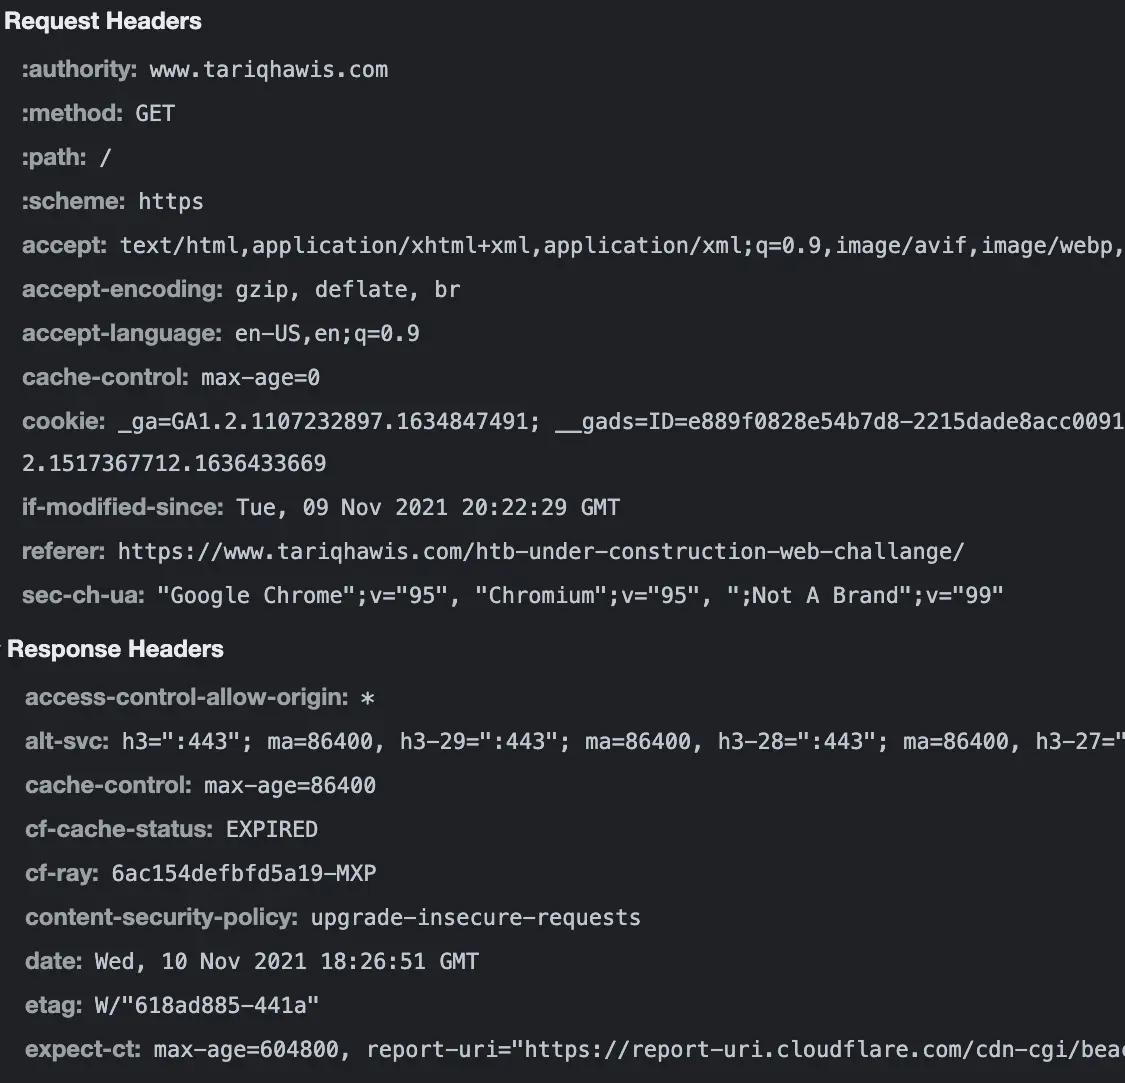 (HTTP headers of tariqhawis.com)
HTTP Security headers are part of these HTTP headers which focus on improving overall security for the web applications by preventing several web attacks such as Cross-Site Scripting and Clickjacking.
If you would like to read more about HTTP security headers, refer to OWASP Secure Headers Project
How to implement HTTP Security Headers
The traditional way followed by most of the SysAdmins is by defining the headers at the Web Server. However, the majority of the owners of the websites who are using shared hosting may not have access to the webserver to do the changes. This is one of the reasons to go for alternative and more handy ways. And the easiest way for my opinion is by using CloudFlare Workers
What is Cloudflare Workers
According to Cloudflare…
Cloudflare Workers is a serverless application platform running on Cloudflare’s global cloud network in over 200 cities around the world
Workers have many useful applications its runtime uses the V8 engine - the same engine used by Chromium and Node.js which allow you to implement many of the standard APIs available in the modern browsers.
Utilize Headers API
Headers API is one of the standard APIs that we can use to modify and set the headers that we need to be used for the HTTP communication of our website. The idea is to call headers and then use the set function to define the right security headers.
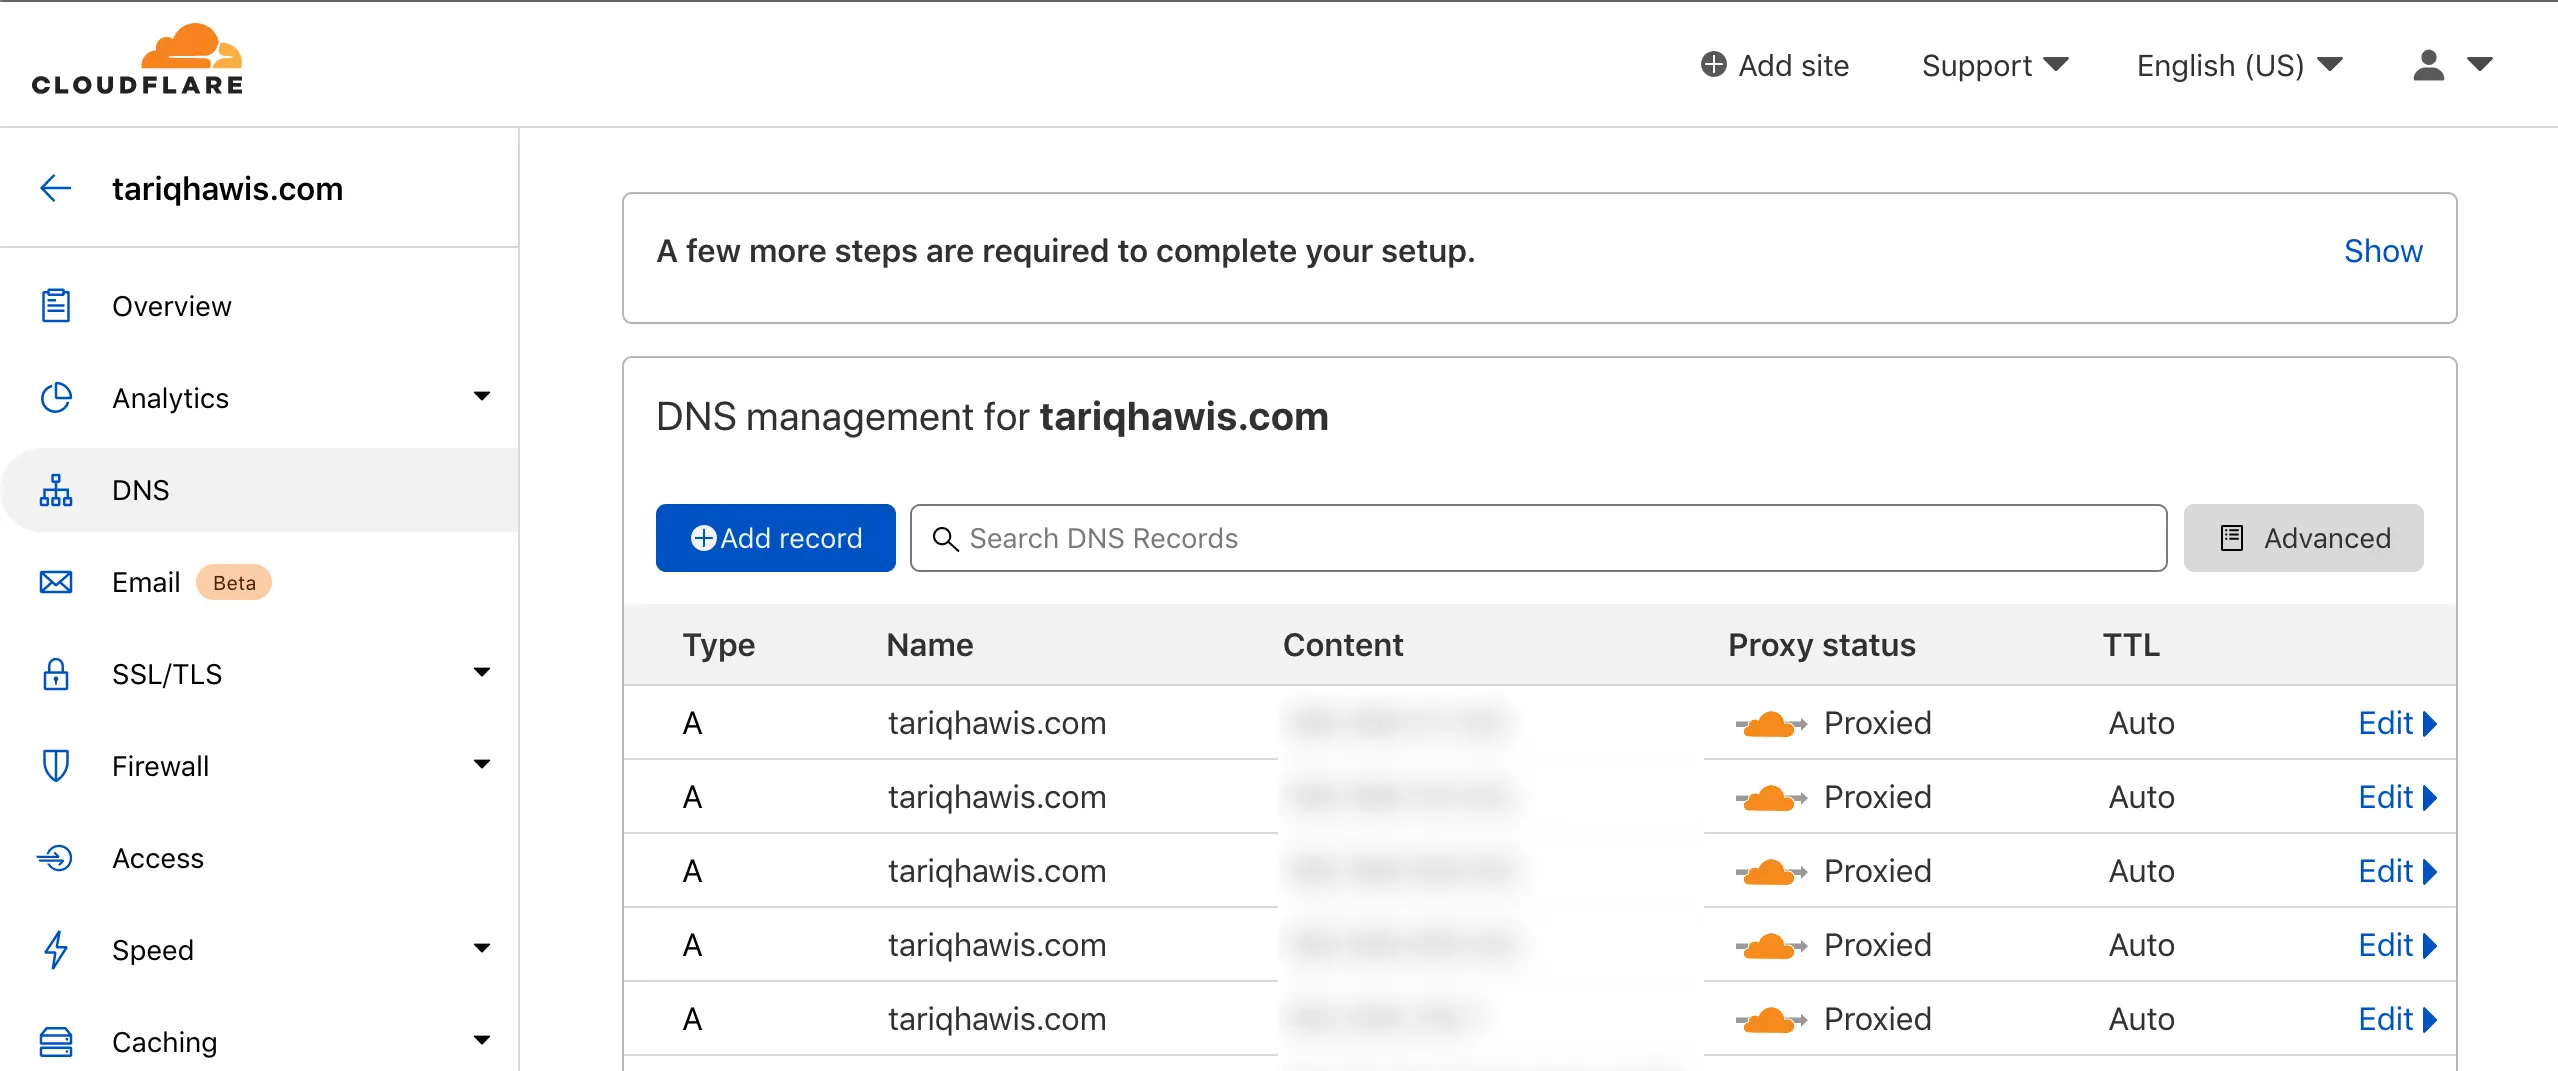
Configure your Cloudflare DNS
First of all, - if you have not done that already - you need to use Cloudflare DNS management, to do this, create an account in Cloudflare then you will see in the Dashboard the NS server addresses of the Cloudflare. Copy these addresses and in your DNS registrar update the old NS servers with the ones you just copied from Cloudflare. After the changes, wait for a few seconds to get all your records synced, eventually, you will see all your records in your dashboard. Now you can use caching, protection, CDN, and many features of Cloudflare including Workers.
Setup Security Headers with Cloudflare Workers
In this section, we are going to create a Workers account, create a new worker, and finally publish a worker code that will set our security headers, so let’s get started.
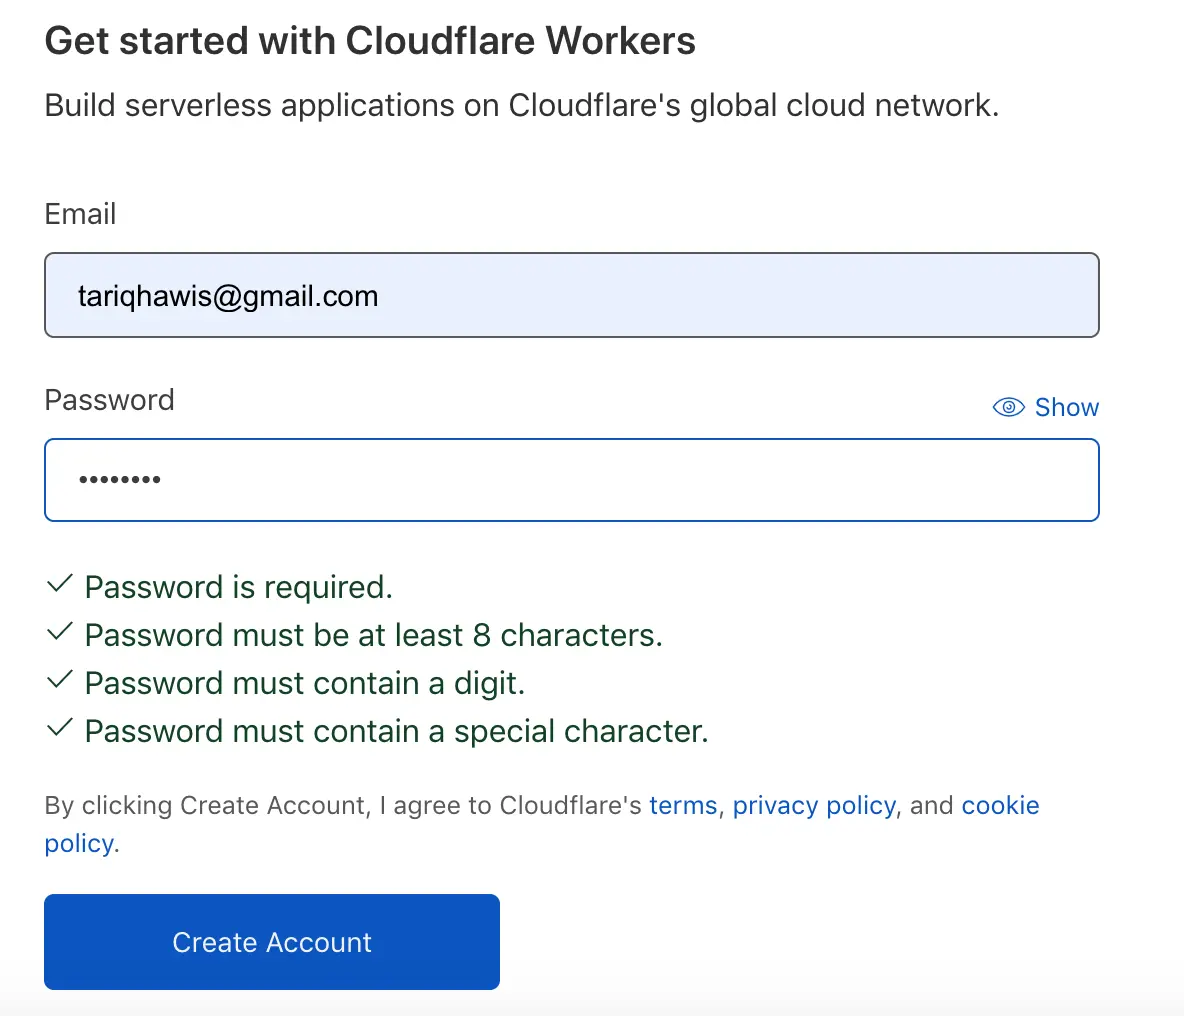
Signup for a Worker Account
Now we get to the important part. To use workers first you need to sign up for a Cloudflare Workers account.
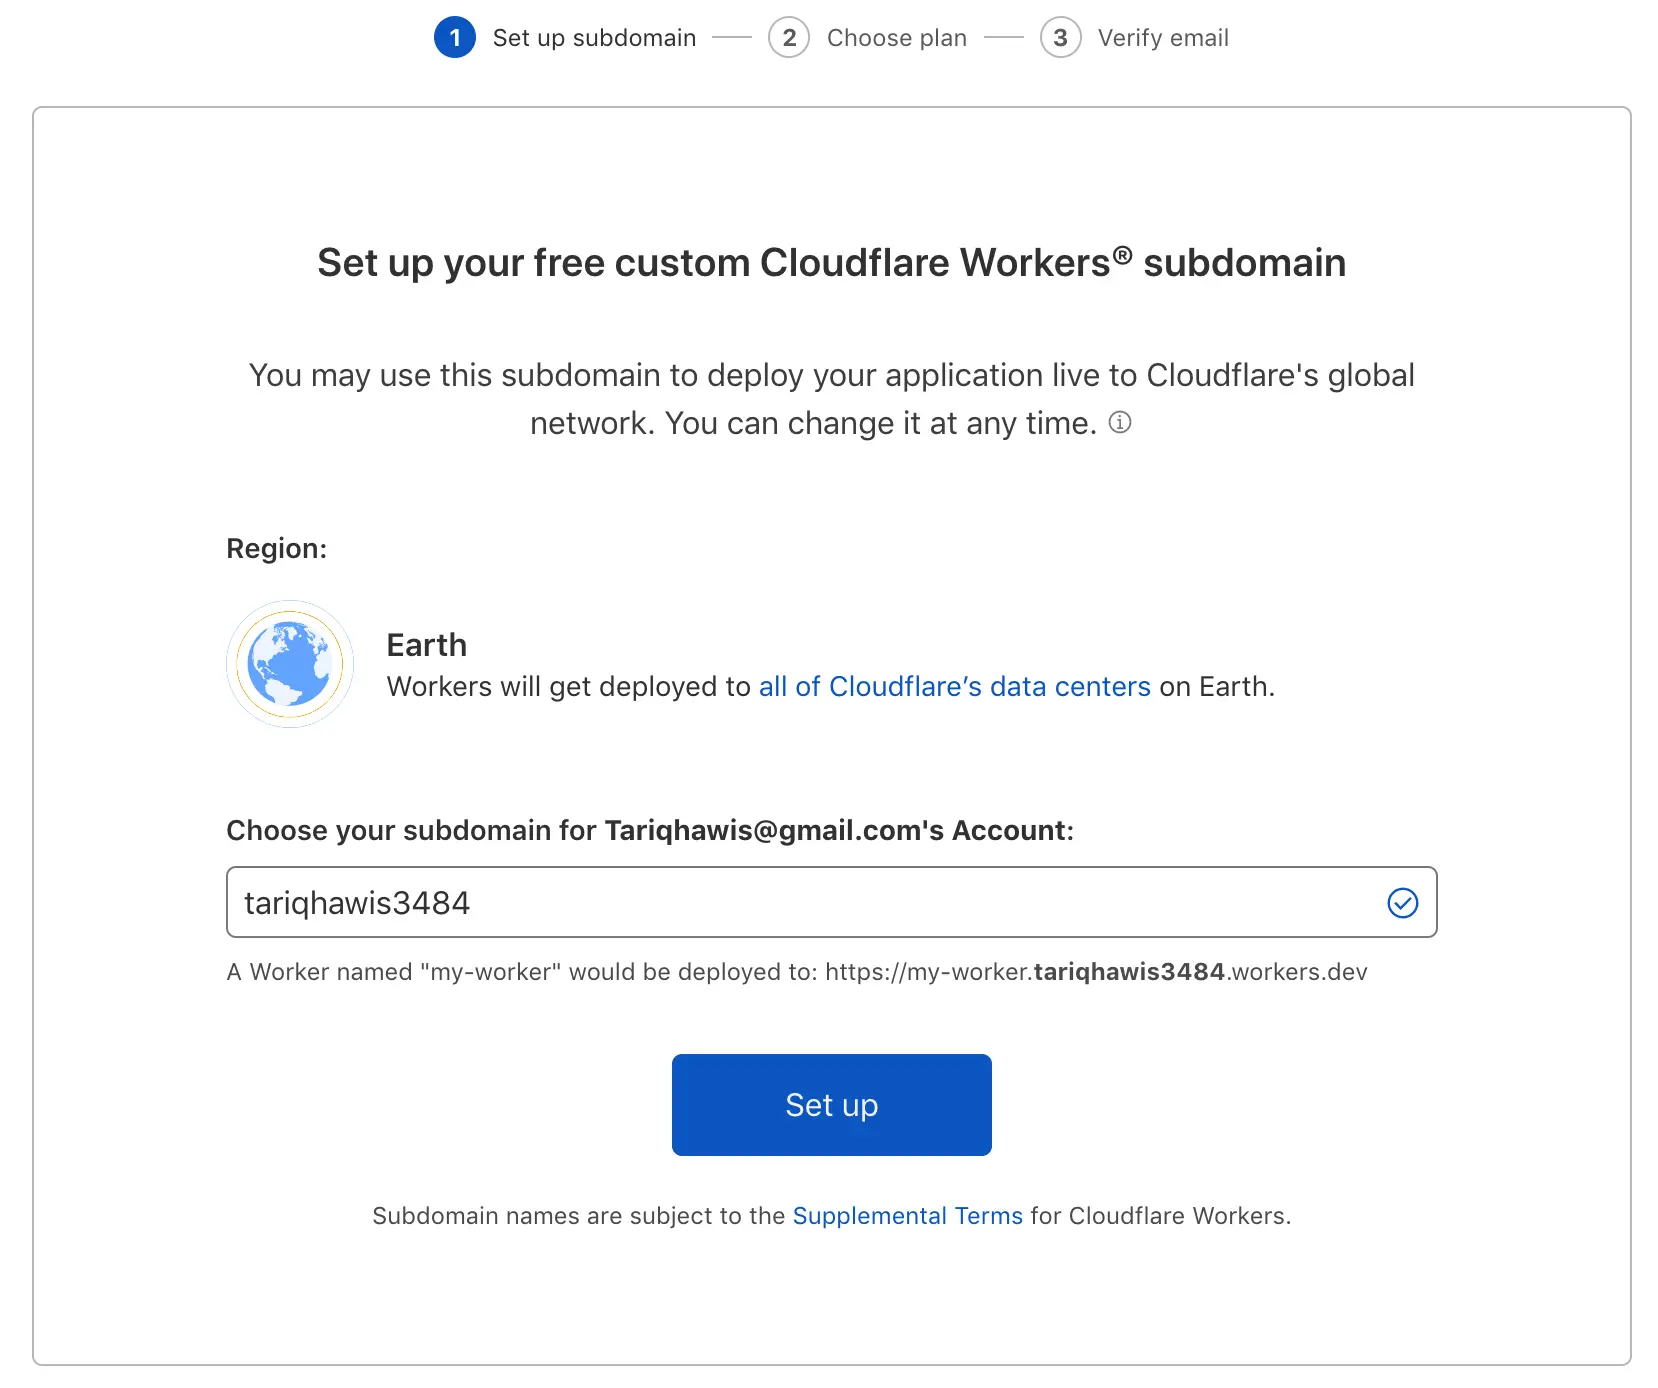
The signup process will guide you through choosing a *.workers.dev subdomain and verifying your email address, both of which are required to publish.
The steps are as follows:
First, Create your account in Cloudflare Workers
Second, choose your subdomain under *.workers.dev
Then, choose your plan..
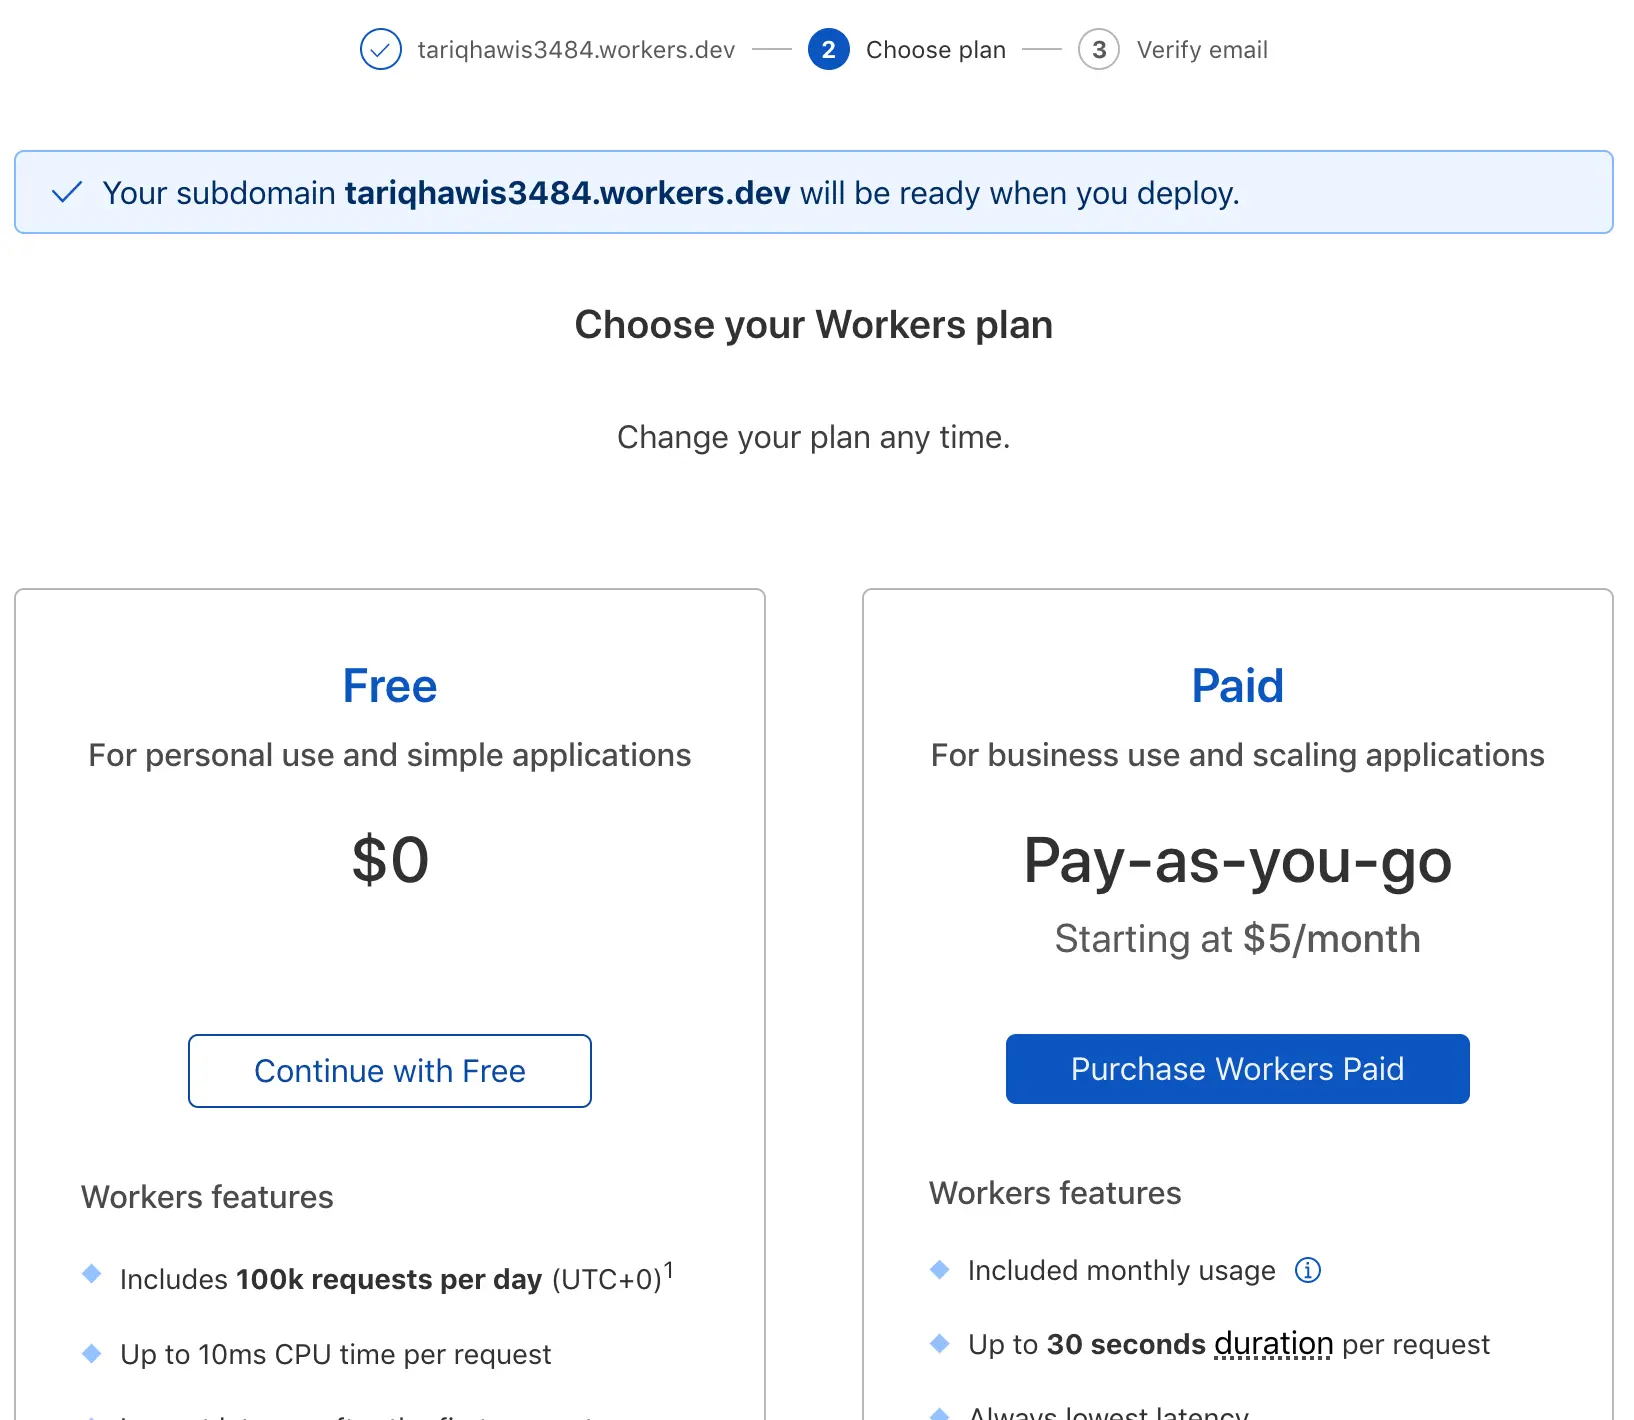
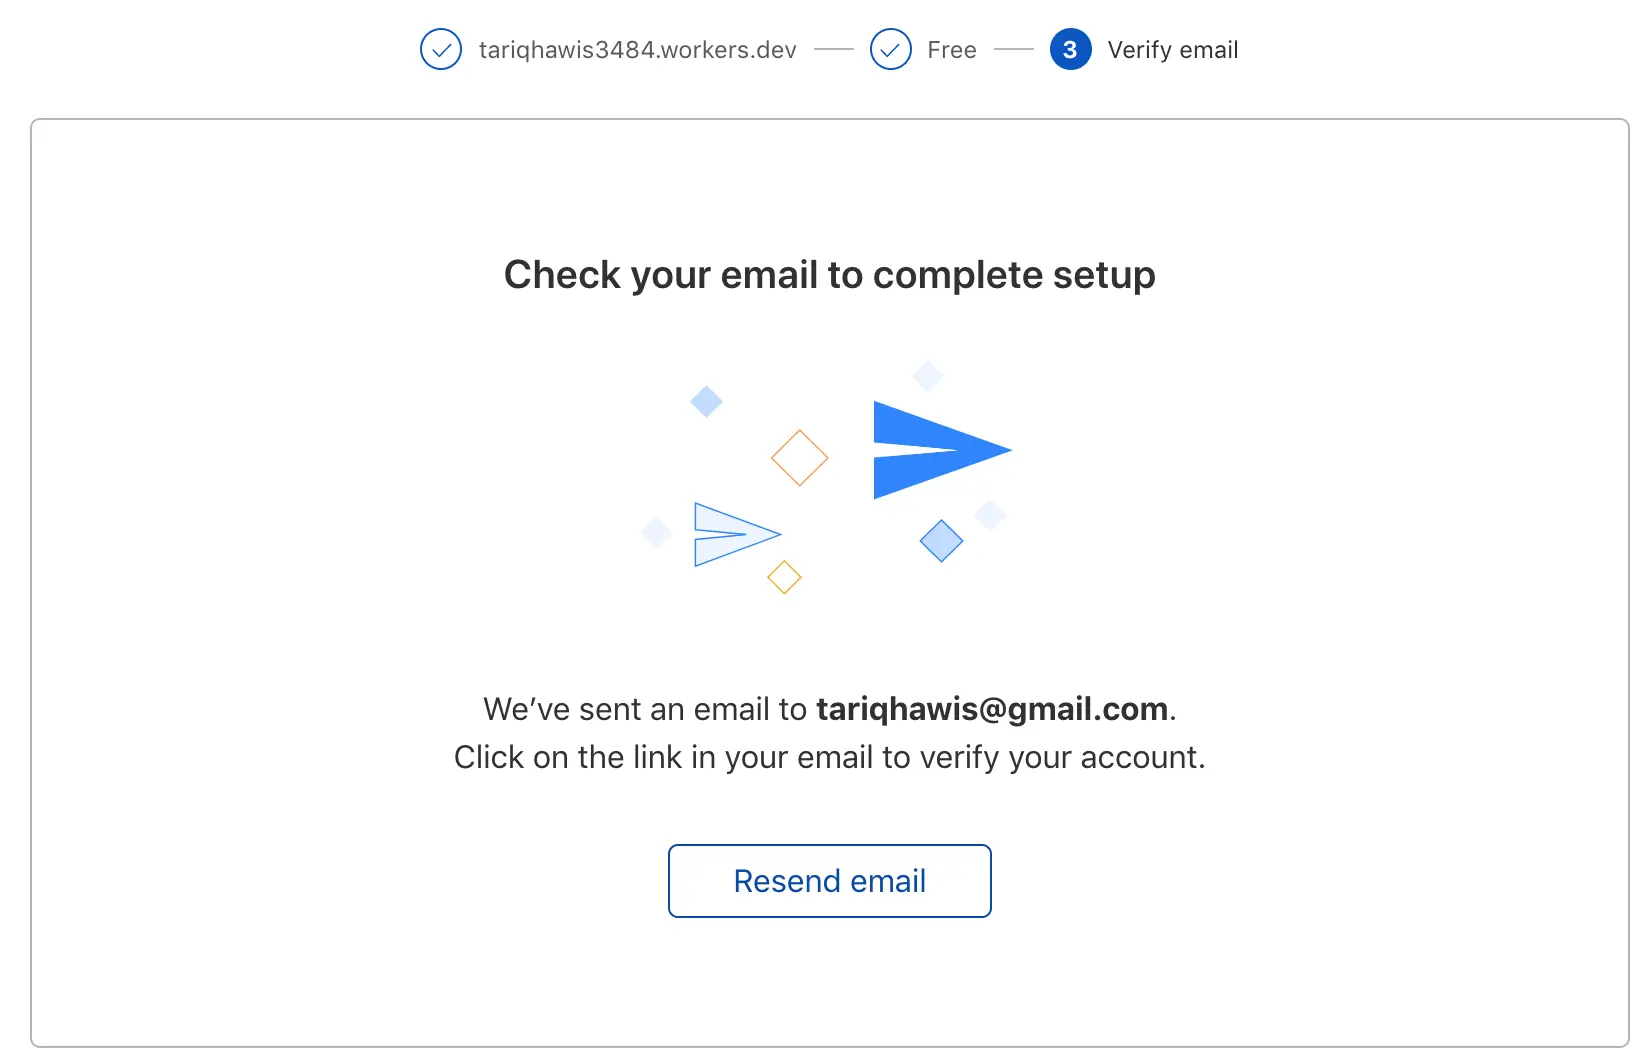
Last but not least, verify your email:
Create a new Worker
Now that we have workers account like this one:
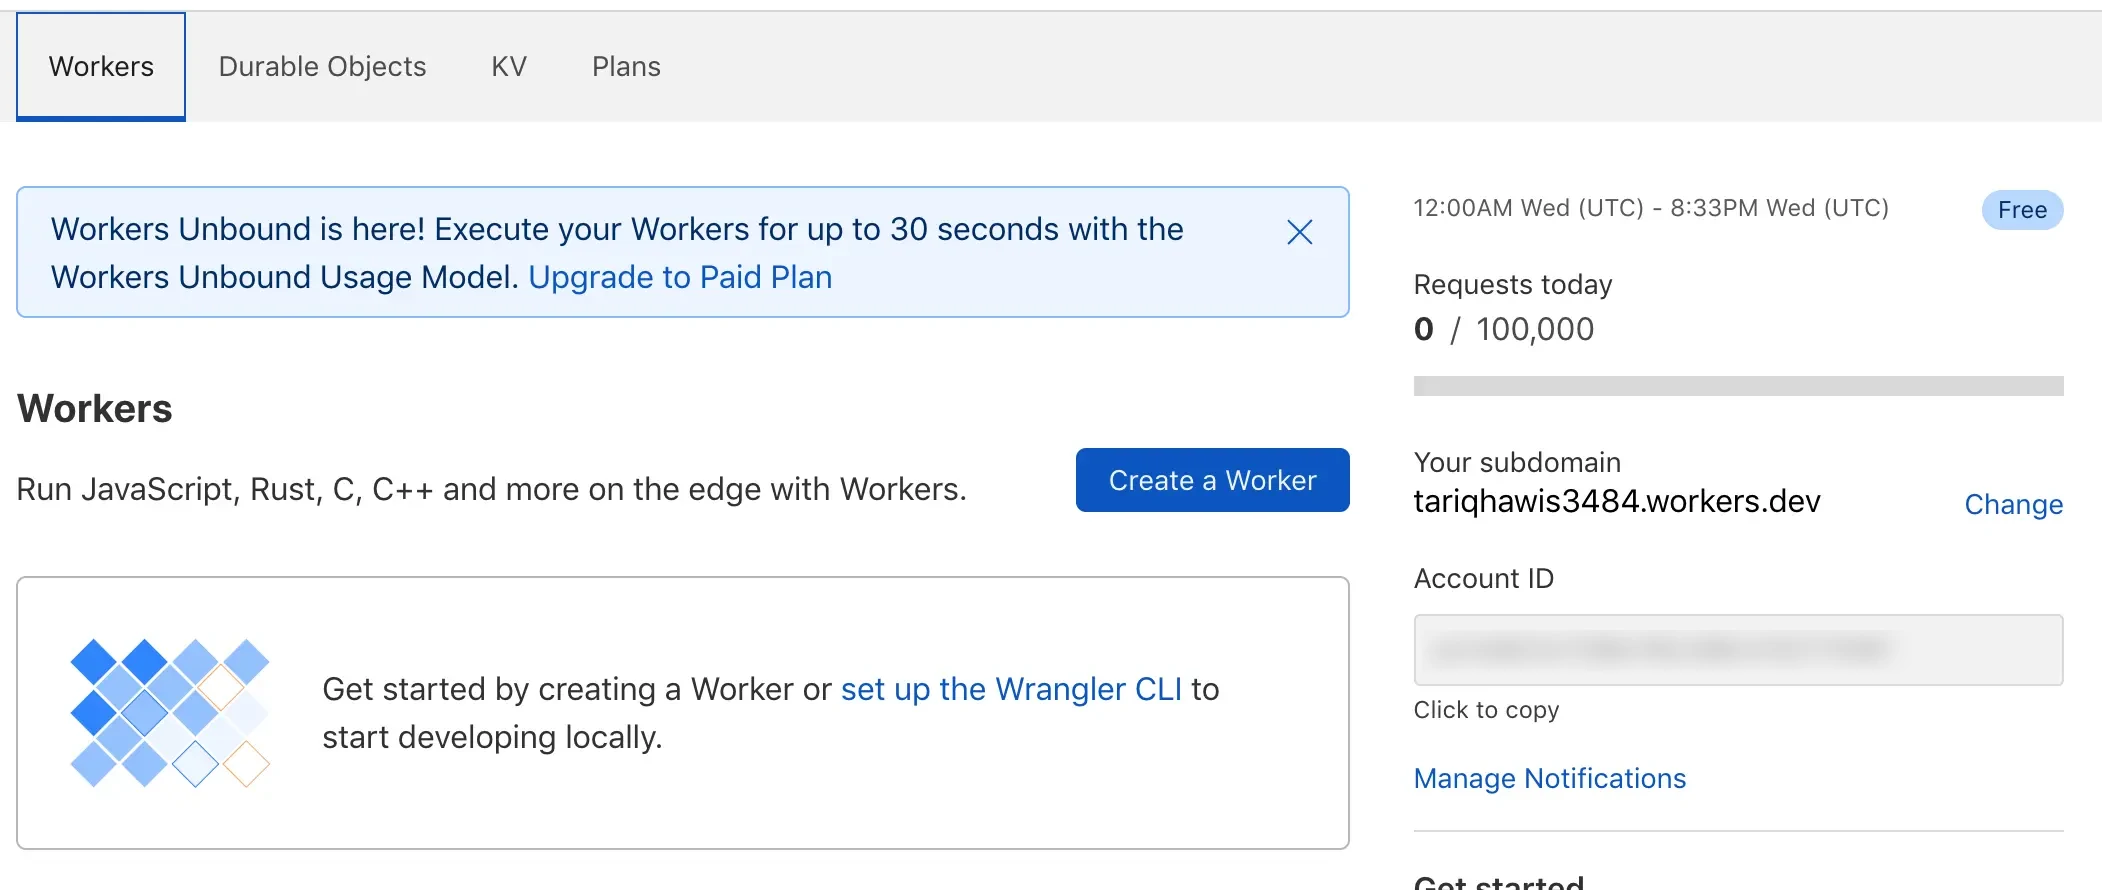
Click on Create a Worker, Now you have this IDE like page
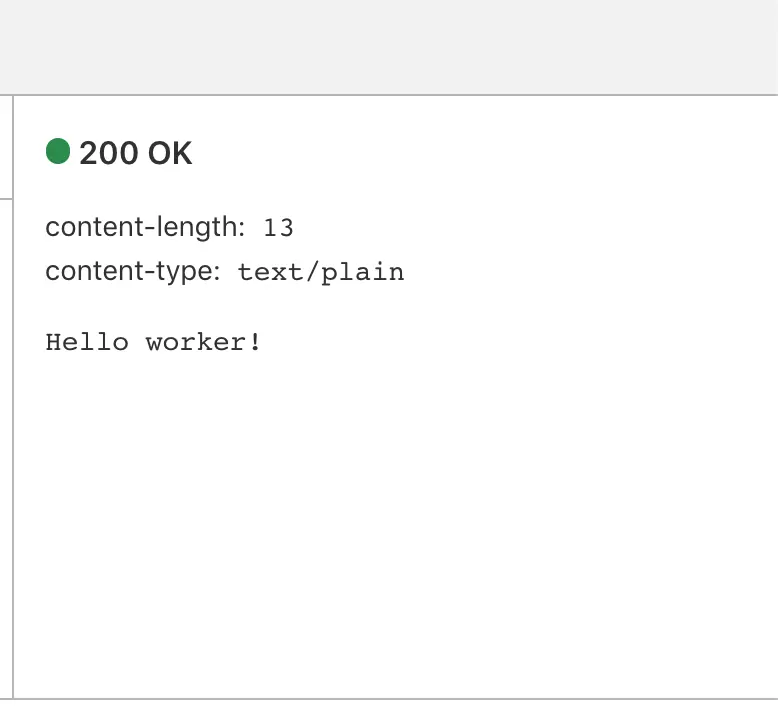
Let’s test the worker with a hello code
addEventListener("fetch", event => {
  event.respondWith(handleRequest(event.request))
})

async function handleRequest(request) {
  return new Response("Hello worker!", {
    headers: { "content-type": "text/plain" }
  })
}
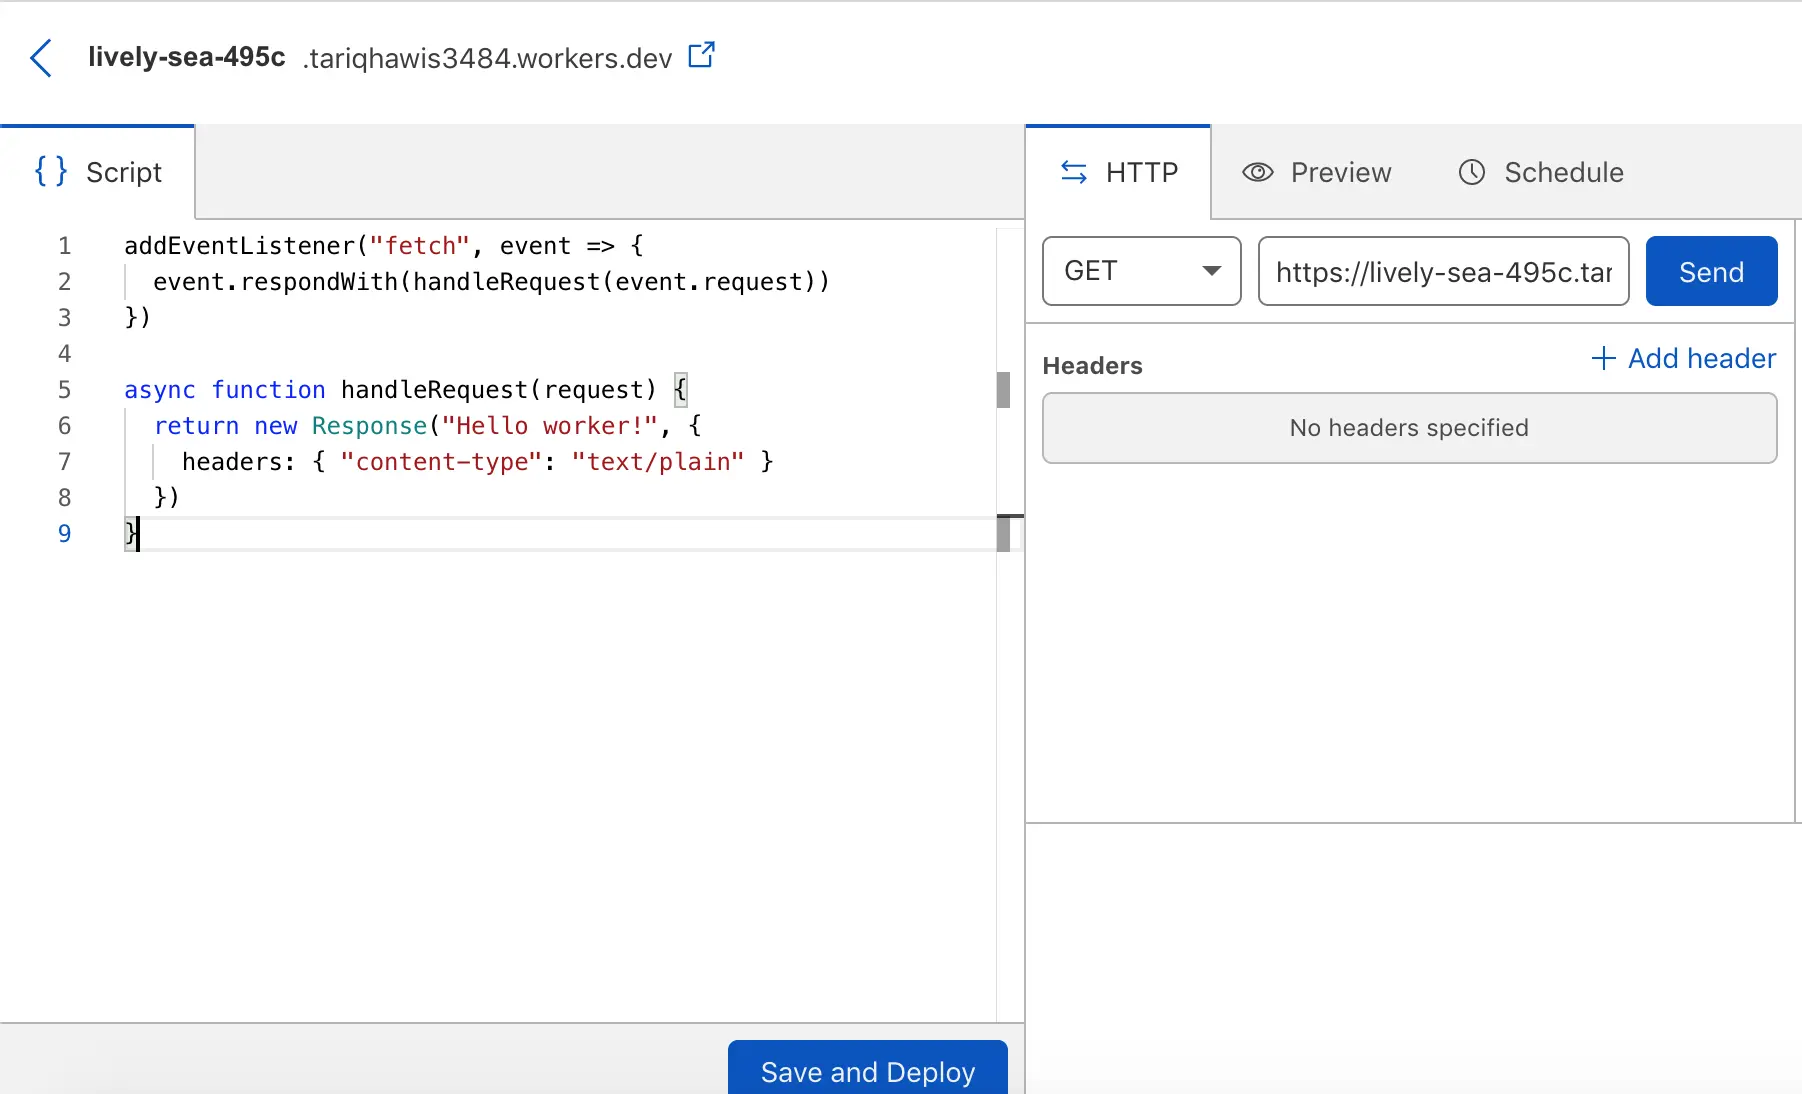
Now click on send and you will see a 200 page with a greeting message:
Create the Security Headers Worker
To set HTTP security headers we need to make a script that will call headers API as we have discussed earlier. If you are not a developer, do not worry. Cloudflare docs site is rich withWorkers examples that you can adapt to your website.
For HTTP Security Headers let’s copy Cloudflare security headers example. And paste it at our Workers script.
I will do some edit to the code. First I will uncomment the security headers I need. Also, I will remove the TLS check since I have that TLS version restriction already but you can keep it if you want. My code now is like follows:
let DEFAULT_SECURITY_HEADERS = {
    "Content-Security-Policy" : "upgrade-insecure-requests",
    "Strict-Transport-Security" : "max-age=2592000",
    "X-Xss-Protection" : "1; mode=block",
    "X-Frame-Options" : "DENY",
    "X-Content-Type-Options" : "nosniff",
    "Referrer-Policy" : "strict-origin-when-cross-origin",
    "permissions-policy": "interest-cohort=()",
}

let BLOCKED_HEADERS = [
    "Public-Key-Pins",
    "X-Powered-By",
    "X-AspNet-Version",
]

addEventListener('fetch', event => {
    event.respondWith(addHeaders(event.request))
})
async function addHeaders(req) {
    let response = await fetch(req)
    let newHeaders = new Headers(response.headers)

    // This sets the headers for HTML responses:
    if (newHeaders.has("Content-Type") && !newHeaders.get("Content-Type").includes("text/html")) {
        return new Response(response.body, {
            status: response.status,
            statusText: response.statusText,
            headers: newHeaders
        })
    }

    Object.keys(DEFAULT_SECURITY_HEADERS).map(function (name) {
        newHeaders.set(name, DEFAULT_SECURITY_HEADERS[name]);
    })

    BLOCKED_HEADERS.forEach(function (name) {
        newHeaders.delete(name)
    })

    return new Response(response.body, {
        status: response.status,
        statusText: response.statusText,
        headers: newHeaders
    })
}
Don’t forget to change my domain in the permissions-policy header to your website’s domain
Currently, you have the code inside the Script tab. Click on Save and Deploy, you will get a confirmation pop-up message, click again on Save and Deploy
The Headers are now applied to your worker’s subdomain under workers.dev. Confirm that the route is enabled like below which means the code is deployed:

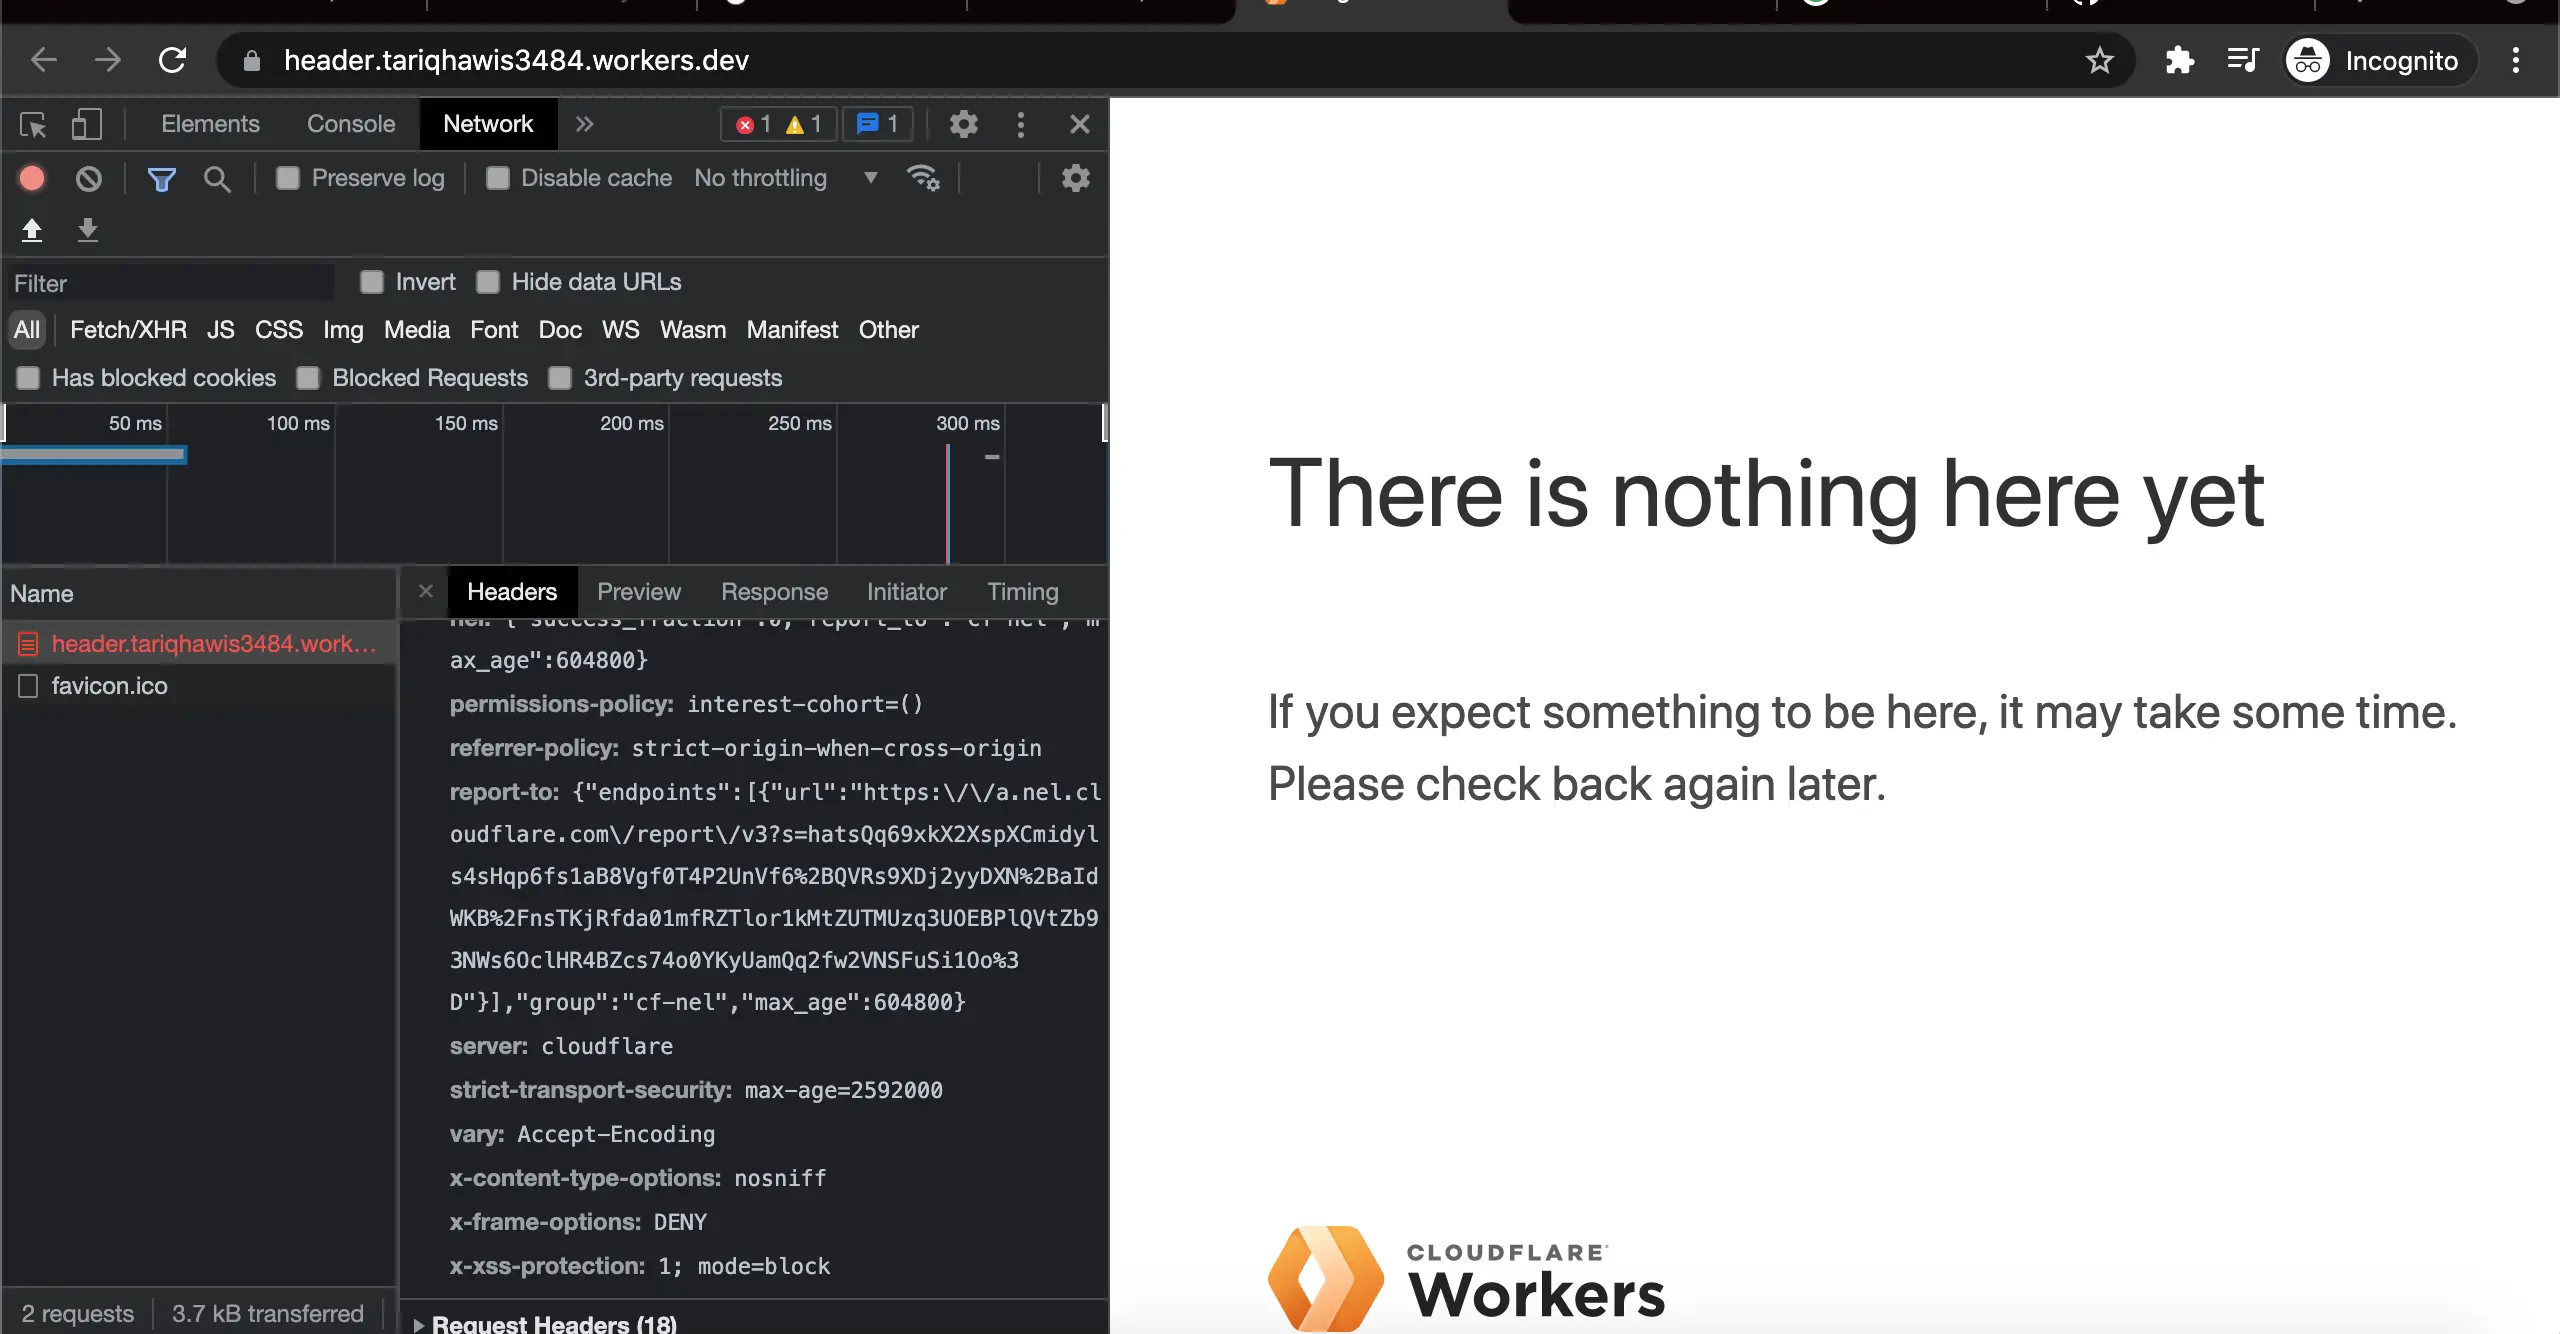
To check our new headers, open a new window in your chrome, activate Developer Tools, then go to the network tab. No open your worker’s subdomain at that window. Highlight your domain from the name tab at the right, and look for Response Headers under the Headers tab at the right. You should see our new security headers enabled:
It’s time to route this code to our main website
Deploy the Security Headers Worker on our main website
Now we have come to the exciting part. To apply our headers that are deployed under workers.dev subdomain, we need to create a new route this time we will define our main domain so the code will deploy the new headers. To do that we follow the below steps:
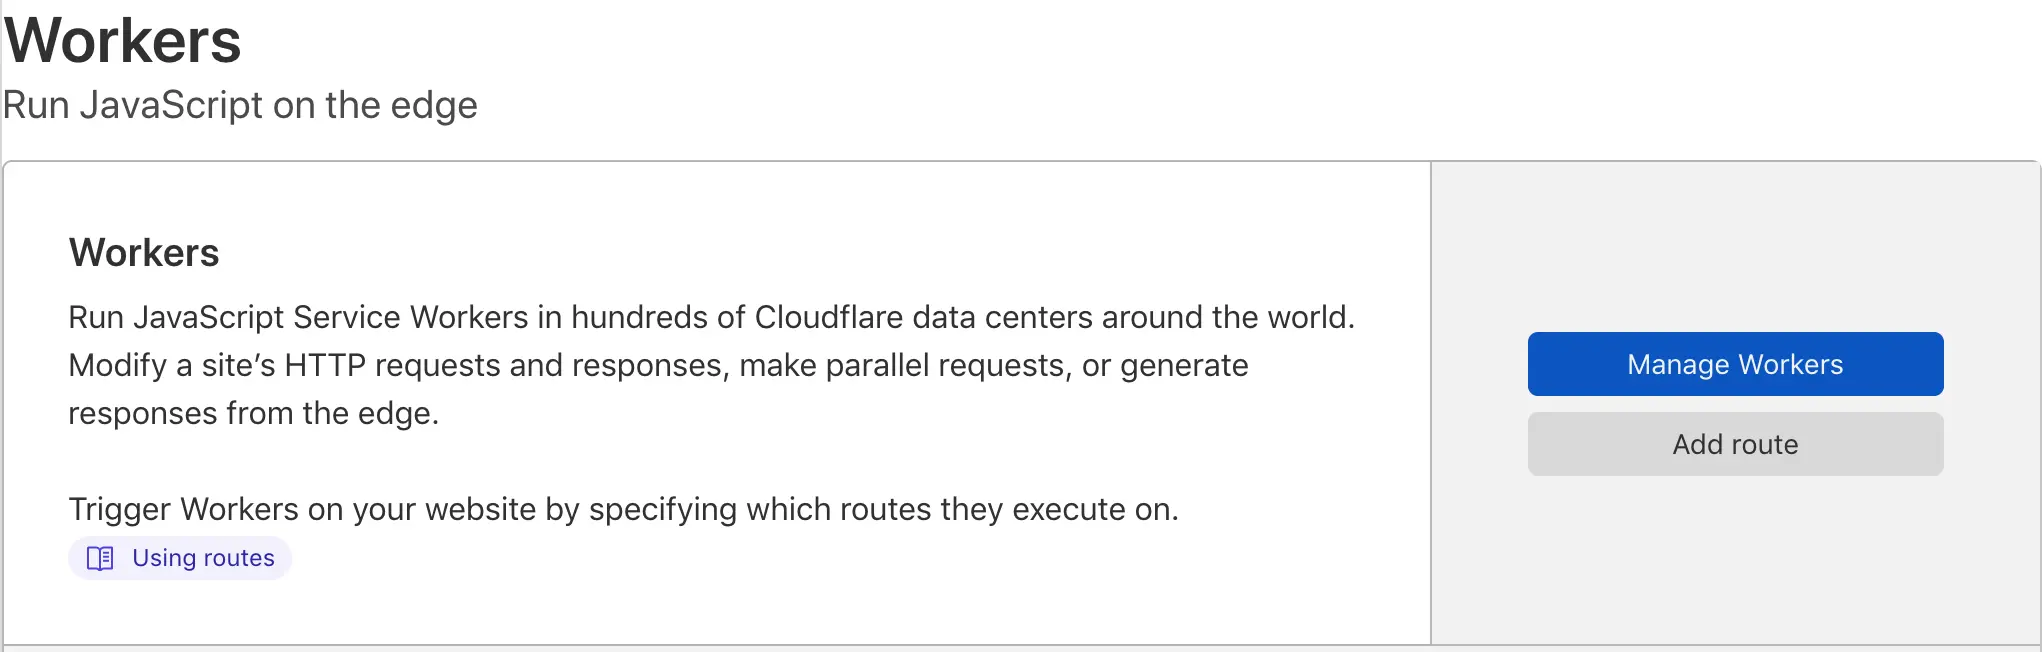
First, Go back to the main Cloudflare page and select workers from there
For some reason the workers page cannot be accessed back from the workers overview page
Next, Click on Add Route. In the pop-up message, add your main domain, then select the workers where you saved your code. Confirm your inputs, then click on save

In my case, I used *.tariqhawis.com/*. That is because I have www and other cName records that I need my workers to be applied to, this is what does the first wildcard indicates. The second wildcard is for the sub-directories inside the website, such as the internal pages.
It’s important to know what is the correct route that suits your website. For example, if your website is using the root domain only without www or any subdomain, my route will not be working with you. Instead, you may use a route like this: tariqhawis.com/*.
After you have saved the changes, check your new deployment in the route table below the page. You can confirm everything you have done by clicking on the route you added from the table to open your Worker page, make sure that the route is deployed with the green slide:
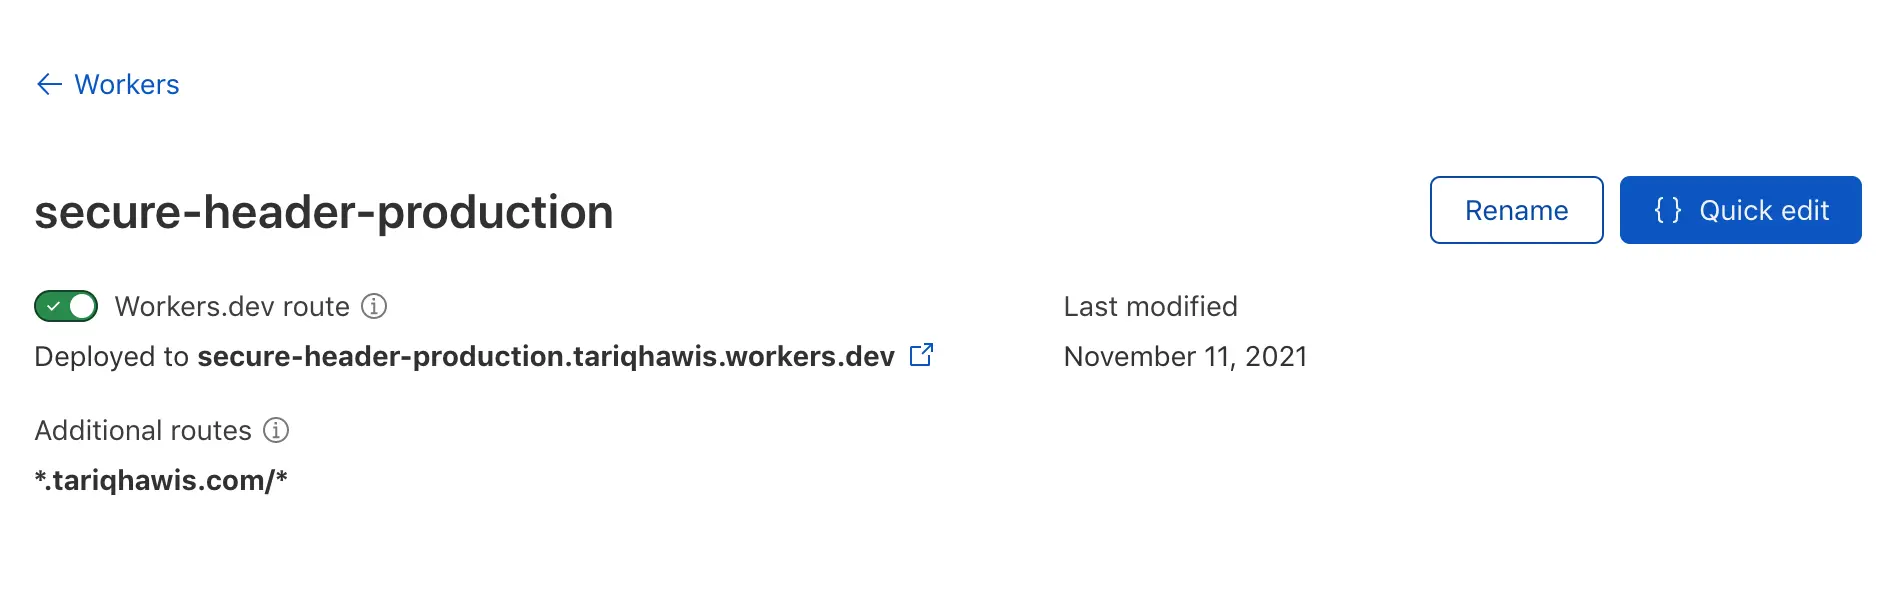
Don’t mind the changes in worker name between the screenshot as the worker in the first steps made for the demo while the other is the actual one which I made for my production site!
Check the new Security Headers on the main website
Now everything is in its right place, let’s do some checks.
First, open your website normally, enable Developer Tools as we did before, go to the network tab, refresh the page and wait for the page to load. Click on the page name under the name tab on the left and look for the response headers on the right. If you configured your worker correctly, you should see our new headers should appear:
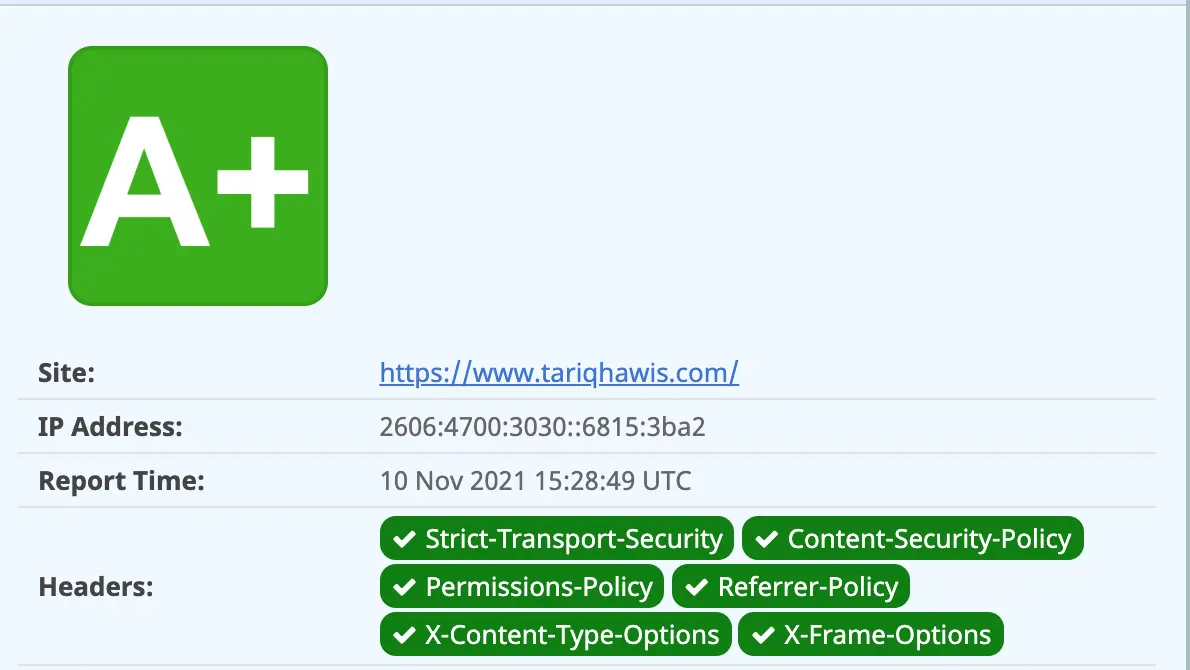
As the last test, I will go ahead and use the Security Headers online tool which was developed by Scott Helme. And here is my result:
Congratulations, you have secured your website’s headers, and you have done nothing to your web server.
Conclusion
In this course, we have earned how we can harden our website with HTTP security headers Without exerting ourselves with Web Server configuration by using Cloudflare Workers which let us deploy security headers using Headers API and let the Cloudflare serve our security headers instead of our origin “the server”.
Share
Latest Posts in Security